Deploying AWS lambda to LocalStack with Terraform
With my R-CNN model training, I suddenly have a lot of free time, so I decided to use it to learn something new - specifically, LocalStack and Terraform integration. In this post, I’ll create an AWS Lambda that wraps an sklearn LogisticRegression predictor (after all, this blog focuses on ML, AI, and cloud). I’ll deploy it locally, first using the sam cli AWS tool, then to a LocalStack container, and finally to the cloud to confirm that everything works consistently across environments.
I could have focused on just one part - the one mentioned in the title - but as a fullstack developer, I wanted to bundle everything together. This blog mainly serves as a personal knowledge repository, and I remember best when I have the full context.
The code - part 1: training LogisticRegression model
Since the code is very short, I’ll just dump it all into one snippet:
import joblib
import os
import pandas as pd

from sklearn.feature_extraction.text import TfidfVectorizer
from sklearn.linear_model import LogisticRegression
from sklearn.metrics import accuracy_score, classification_report
from sklearn.model_selection import train_test_split
from sklearn.utils import shuffle

with open("neg_tweets.txt", "r", encoding="utf-8") as f:
    neg_tweets = f.readlines()

with open("pos_tweets.txt", "r", encoding="utf-8") as f:
    pos_tweets = f.readlines()

neg_tweets = [tweet.strip() for tweet in neg_tweets]
pos_tweets = [tweet.strip() for tweet in pos_tweets]
neg_df = pd.DataFrame(neg_tweets, columns=["post"])
neg_df["sentiment"] = 0
pos_df = pd.DataFrame(pos_tweets, columns=["post"])
pos_df["sentiment"] = 1
tweets_df = pd.concat([neg_df, pos_df], ignore_index=True)
tweets_df = shuffle(tweets_df, random_state=42).reset_index(drop=True)
X_train, X_test, y_train, y_test = train_test_split(tweets_df["post"], tweets_df["sentiment"], test_size=0.2, random_state=42)
vectorizer = TfidfVectorizer()
X_train_vec = vectorizer.fit_transform(X_train)
X_test_vec = vectorizer.transform(X_test)
model = LogisticRegression()

model.fit(X_train_vec, y_train)

y_pred = model.predict(X_test_vec)
accuracy = accuracy_score(y_test, y_pred)

print("Classification Report:\n", classification_report(y_test, y_pred))

joblib.dump(model, os.path.join("..", "saved_models", "logistic_regression_model.pkl"))
joblib.dump(vectorizer, os.path.join("..", "saved_models", "vectorizer.pkl"))
This is almost a bootcamp-level example of training a LogisticRegression model. I wanted this post to tie into ML, so that’s the approach I took. I’m saving both the model and the vectorizer, as both will be needed for the Lambda function to work. The classification report shows that the model isn’t particularly strong in identifying most of the positive posts, but that’s understandable - the positive sample size was only half that of the negative sample. Here’s the report:
Classification Report:
               precision    recall  f1-score   support

           0       0.80      0.99      0.88       282
           1       0.92      0.40      0.56       119

    accuracy                           0.81       401
   macro avg       0.86      0.69      0.72       401
weighted avg       0.83      0.81      0.79       401
As you can see, the model is able to identify and correctly classify only 40% of the total positive examples, but let’s not be bothered by that, as that’s just a hello-world kind of example - it just needs to output anything.
The code - part 2: defining lambda function and sam templates
To create the Lambda folder, I used sam cli tool. Initially, I wanted to use Lambda layers, which worked locally with sam cli, but failed when I deployed to the cloud. I had created one layer for model-related files and another for dependencies. However, the dependencies (like sklearn, pandas etc.) added up to over 250 MB, which is AWS’s layer size limit for a single Lambda. With no way around this limitation, I turned to an alternative approach: Docker containers. AWS introduced Lambda container support a few years ago, and I must say, the developer experience is excellent.
Before diving into containers, a note on Lambda layers: dependencies must be built on Linux. If you build a layer with dependencies on Windows (using pip install -r requirements.txt --target layers/lambda_dependencies_layer/python/), it will include some Windows-specific components. This might work when testing locally with SAM, but will fail after deployment. I encountered this error: [ERROR] AttributeError: module 'os' has no attribute 'add_dll_directory'. The error disappeared when I built my dependencies layer in WSL, but I still had to switch to a Dockerized Lambda due to the size issue.
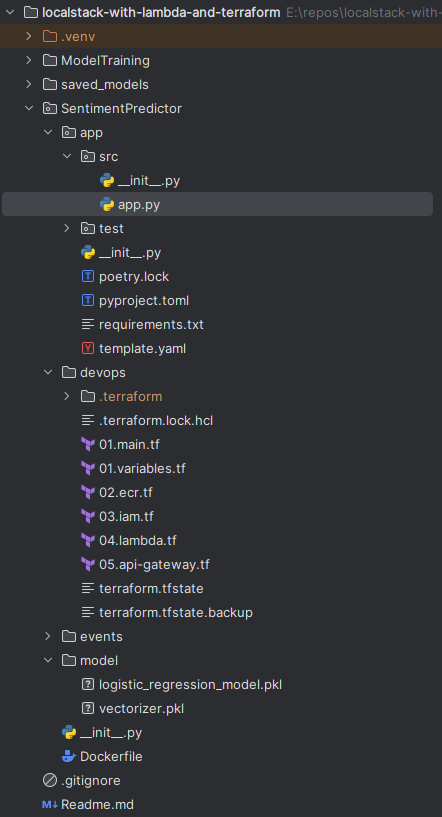
To wrap up this section, here’s a screenshot of my project layout:
And the lambda code:
import os

import joblib
import json

from aws_lambda_powertools.utilities.data_classes import event_source, APIGatewayProxyEvent
from aws_lambda_powertools.utilities.typing import LambdaContext
from sklearn.feature_extraction.text import TfidfVectorizer
from sklearn.linear_model import LogisticRegression

model_file = os.getenv("MODEL_FILE")
vectorizer_file = os.getenv("VECTORIZER_FILE")
model: LogisticRegression = joblib.load(model_file)
vectorizer: TfidfVectorizer = joblib.load(vectorizer_file)


@event_source(data_class=APIGatewayProxyEvent)
def lambda_handler(event: APIGatewayProxyEvent, context: LambdaContext) -> dict:
    input = event.json_body["input"]
    input_vector = vectorizer.transform([input])
    prediction = int(model.predict(input_vector)[0])

    return {
        'statusCode': 200,
        'body': json.dumps(
            {
                "predicted_label": prediction,
            }
        )
    }
The logic here is not complex at all, but I want to highlight one key point: the use of the aws-lambda-powertools library. Coming from a background in compiled languages (C#, Scala), I often find it frustrating when Python programmers skip type hints, relying on dictionaries and magic strings instead. We can make our lives much easier by leveraging all the available tools in our chosen language.
In the Python Lambda context, that’s where the aws-lambda-powertools library shines. It provides type-safe members specific to certain Lambda trigger types. Here, since the Lambda will be called via an API Gateway, we use the appropriate decorator, specifying that we expect an APIGatewayProxyEvent. This allows me to use the exposed json_body property directly within the function. And they really have it all. Is your lambda processing Kafka events? Use @event_source(data_class=KafkaEvent). Is it using Kinesis Event Streams? Use: @event_source(data_class=KinesisStreamEvent).
Side note: If you find yourself working with AWS services using the boto3 library, there are accompanying type-hint libraries for various IDEs: mypy-boto3-*, where the asterisk represents the specific AWS service name, such as iam, s3, etc.
Now to the sam template:
Resources:
  SentimentPredictorFunction:
    Type: AWS::Serverless::Function
    Properties:
      PackageType: Image
      ImageUri: sentimentpredictor:latest
      MemorySize: 128
      Timeout: 900
      Events:
        SentimentPostAPI:
          Type: Api
          Properties:
            Path: /predict
            Method: POST
Again, this is very basic, as the use of Docker simplified everything greatly. ImageUri points to the locally built image and the template ends with the api definition. Couldn’t be simpler, and the same goes for the Dockerfile:
FROM public.ecr.aws/lambda/python:3.12

COPY app/ ${LAMBDA_TASK_ROOT}/app/
COPY model/logistic_regression_model.pkl /opt/model/logistic_regression_model.pkl
COPY model/vectorizer.pkl /opt/model/vectorizer.pkl
ENV MODEL_FILE=/opt/model/logistic_regression_model.pkl
ENV VECTORIZER_FILE=/opt/model/vectorizer.pkl
COPY app/requirements.txt .
RUN pip install -r requirements.txt --target "${LAMBDA_TASK_ROOT}"
CMD ["app.src.app.lambda_handler"]
LAMBDA_TASK_ROOT is an environment variable in AWS Lambda that specifies the root directory of the deployed Lambda function’s code. AWS Lambda uses this directory to store the function’s code package after deployment. Another thing to note here is where I’ve put the model-related files: in the /opt directory. It might as well be put anywhere, but it turns out lambda layers are put there. I thought that for people having some experience with them, this location would look familiar.
This was fun, especially so, because everything is working correctly. If I run this lambda locally using sam cli (sam local start-api), it’s reachable under http://127.0.0.1:3000/predict.
The code - part 3: creating Terraform definitions
The first important piece of Terraform code is found in the 02.ecr.tf file (I like to use a naming convention with numbers at the beginning of each item, as it gives me a clear view of the sequence of events during deployment). For sure you’ll notice the multiple provisioner blocks. At first I tried putting it all as a single HEREDOC, but for some reason it didn’t want to work. Additionally, the official Terraform documentation suggests this approach, so I followed their guidance. There’s also one subtlety hidden here: --provenance=false - without this flag set, I kept getting The image manifest or layer media type for the source image <image_source> is not supported. error. I managed to find a solution, but I didn’t really dig deep enough to understand what’s causing it. Sometimes it’s ok to let a little bit of magic in ;)
resource "aws_ecr_repository" "sentiment_predictor_repo" {
  name = var.ecr_repository_name
}

data "aws_ecr_authorization_token" "auth" {}

resource "null_resource" "docker_push" {
  provisioner "local-exec" {
    command = "aws ecr get-login-password --region ${var.region} --profile ${var.profile} | docker login --username AWS --password-stdin ${data.aws_ecr_authorization_token.auth.proxy_endpoint}"
  }

  provisioner "local-exec" {
    command = "docker build --provenance=false -t ${var.ecr_repository_name} .."
  }

  provisioner "local-exec" {
    command = "docker tag ${var.ecr_repository_name}:latest ${var.account_id}.dkr.ecr.${var.region}.amazonaws.com/${var.ecr_repository_name}:latest"
  }

  provisioner "local-exec" {
    command = "docker push ${var.account_id}.dkr.ecr.${var.region}.amazonaws.com/${var.ecr_repository_name}:latest"
  }

  depends_on = [aws_ecr_repository.sentiment_predictor_repo]
}
IAM roles are quite basic, so I’ll just drop their definitions here without any comment, the same goes for lambda:
resource "aws_iam_role" "lambda_exec_role" {
  name = "lambda_exec_role"
  assume_role_policy = jsonencode({
    Version = "2012-10-17"
    Statement = [{
      Action    = "sts:AssumeRole"
      Effect    = "Allow"
      Principal = { Service = "lambda.amazonaws.com" }
    }]
  })
}

resource "aws_iam_policy_attachment" "lambda_policy_attachment" {
  name       = "SentimentPredictor lambda execution policy"
  policy_arn = "arn:aws:iam::aws:policy/service-role/AWSLambdaBasicExecutionRole"
  roles      = [aws_iam_role.lambda_exec_role.name]
}

resource "aws_lambda_function" "sentiment_predictor" {
  function_name = "SentimentPredictorFunction"
  role          = aws_iam_role.lambda_exec_role.arn
  package_type  = "Image"
  image_uri     = "${aws_ecr_repository.sentiment_predictor_repo.repository_url}:latest"
  memory_size   = 128
  timeout       = 900

  environment {
    variables = {
      MODEL_FILE      = "/opt/model/logistic_regression_model.pkl"
      VECTORIZER_FILE = "/opt/model/vectorizer.pkl"
    }
  }

  depends_on = [null_resource.docker_push]
}
As for the API gateway - this configuration sets up an AWS API Gateway to expose a Lambda function as a RESTful HTTP endpoint. Here’s what each resource is doing:
- API Gateway:
- Creates an HTTP API Gateway called
SentimentPredictorApi.
- Creates an HTTP API Gateway called
- Lambda Integration:
- Configures the API Gateway to integrate with a Lambda function (
sentiment_predictor). - Uses
AWS_PROXYas the integration type, meaning the request is directly forwarded to the Lambda function. - Specifies the payload format version 2.0, which is standard for HTTP APIs with Lambda proxy integrations.
- Configures the API Gateway to integrate with a Lambda function (
- Route:
- Defines a route for the API that triggers on a POST request to the
/predictpath. - Connects the route to the previously defined Lambda integration, enabling the route to invoke the Lambda.
- Defines a route for the API that triggers on a POST request to the
- Stage:
- Deploys the API in a prod stage, enabling access to the endpoint.
- Sets
auto_deployto true, allowing any changes to the API configuration to automatically be deployed. Withauto_deployenabled, as soon as the Terraform code is applied, the changes go live in the specified stage automatically.
- Lambda Permission:
- Grants API Gateway permission to invoke the Lambda function.
- Uses the ARN of the API Gateway to limit the invocation permissions specifically to requests coming from this API.
resource "aws_apigatewayv2_api" "sentiment_predictor_api" {
  name          = "SentimentPredictorApi"
  protocol_type = "HTTP"
}

resource "aws_apigatewayv2_integration" "lambda_integration" {
  api_id                 = aws_apigatewayv2_api.sentiment_predictor_api.id
  integration_type       = "AWS_PROXY"
  integration_uri        = aws_lambda_function.sentiment_predictor.invoke_arn
  payload_format_version = "2.0"
}

resource "aws_apigatewayv2_route" "predict_route" {
  api_id    = aws_apigatewayv2_api.sentiment_predictor_api.id
  route_key = "POST /predict"
  target    = "integrations/${aws_apigatewayv2_integration.lambda_integration.id}"
}

resource "aws_apigatewayv2_stage" "prod_stage" {
  api_id      = aws_apigatewayv2_api.sentiment_predictor_api.id
  name        = "prod"
  auto_deploy = true
}

resource "aws_lambda_permission" "api_gateway_invoke" {
  statement_id  = "AllowAPIGatewayInvoke"
  action        = "lambda:InvokeFunction"
  function_name = aws_lambda_function.sentiment_predictor.function_name
  principal     = "apigateway.amazonaws.com"
  source_arn    = "${aws_apigatewayv2_api.sentiment_predictor_api.execution_arn}/*/*"
}

output "api_gateway_url" {
  value = "${aws_apigatewayv2_api.sentiment_predictor_api.api_endpoint}/prod/predict"
}
Now, if I deploy it to AWS, it gets exposed publicly: https://random-string.execute-api.us-east-1.amazonaws.com/prod/predict. Locally and in the cloud it’s served via api gateway. Now onto more fun and that’s deploying it all to LocalStack using Terraform!
The code - part 4: deploying to LocalStack
This part may seem hacky, but it’s structured this way because Terraform’s conditional expressions are limited. Essentially, to enable LocalStack deployment, I only needed to modify one Terraform definition - 02.ecr.tf. The first issue was with this part: data "aws_ecr_authorization_token" "auth" {}. It caused trouble, and despite googling, I couldn’t find an explanation. With this line present, tflocal threw a cryptic exception:
╷
│ Error: Plugin did not respond
│
│   with data.aws_ecr_authorization_token.auth,
│   on 02.ecr.tf line 5, in data "aws_ecr_authorization_token" "auth":
│    5: data "aws_ecr_authorization_token" "auth" {}
│
│ The plugin encountered an error, and failed to respond to the plugin.(*GRPCProvider).ReadDataSource call. The plugin logs may contain more details.
╵

Stack trace from the terraform-provider-aws_v5.74.0_x5.exe plugin:

panic: runtime error: index out of range [0] with length 0
This isn’t an issue, though, because we don’t actually need data "aws_ecr_authorization_token" "auth" {} for LocalStack. Additionally, the first provisioner definition for the docker_push resource isn’t needed. Also, the ECR domain is different for LocalStack.
To accommodate these changes, I created a separate file, 02.ecr.tf, which I placed in the devops/localstack folder. I then created the following PowerShell script to orchestrate the LocalStack deployment. The script backs up all necessary files, such as the Terraform state and the original ECR definitions, makes the required swaps, runs the process, and then restores everything to its original condition:
$ecrOriginal = ".\02.ecr.tf"
$ecrLocalstack = ".\localstack\02.ecr.tf"
$stateOriginal = ".\terraform.tfstate"
$stateBackupOriginal = ".\terraform.tfstate.backup"
$stateLocalstack = ".\localstack\terraform.tfstate"
$stateBackupLocalstack = ".\localstack\terraform.tfstate.backup"
$ecrBackup = ".\02.ecr.tf.bak"
$stateBackup = ".\terraform.tfstate.bak"
$stateBackupBackup = ".\terraform.tfstate.backup.bak"

try {
    Write-Output "Swapping ecr file for LocalStack deployment..."

    Move-Item -Path $ecrOriginal -Destination $ecrBackup -Force
    Copy-Item -Path $ecrLocalstack -Destination $ecrOriginal -Force
    Copy-Item -Path $stateOriginal -Destination $stateBackup -Force
    Copy-Item -Path $stateBackupOriginal -Destination $stateBackupBackup -Force

    Write-Output "Deployment files swapped. Running Terraform commands now."

    tflocal apply -auto-approve -var="account_id=000000000000" -var="is_localstack_deploy=true"
} finally {
    Write-Output "Restoring original files..."

    Move-Item -Path $ecrBackup -Destination $ecrOriginal -Force
    Move-Item -Path $stateBackup -Destination $stateOriginal -Force
    Move-Item -Path $stateBackupBackup -Destination $stateBackupOriginal -Force

    Write-Output "Files restored to their original state."
}
Can you see how unintrusive LocalStack is? It’s very much possible you didn’t even notice it’s presence in the form of the tflocal (instead of just terraform) command call. Btw. they have some more drop-in replacements for AWS tools, for example instead of running aws <command> you’d run awslocal <command>.
This is the ecr definition for LocalStack (note the domain changes):
resource "aws_ecr_repository" "sentiment_predictor_repo" {
  name = var.ecr_repository_name
}

resource "null_resource" "docker_push" {
  provisioner "local-exec" {
    command = "docker build --provenance=false -t ${var.ecr_repository_name} .."
  }

  provisioner "local-exec" {
    command = "docker tag ${var.ecr_repository_name}:latest ${var.account_id}.dkr.ecr.${var.region}.localhost.localstack.cloud:4566/${var.ecr_repository_name}:latest"
  }

  provisioner "local-exec" {
    command = "docker push ${var.account_id}.dkr.ecr.${var.region}.localhost.localstack.cloud:4566/${var.ecr_repository_name}:latest"
  }

  depends_on = [aws_ecr_repository.sentiment_predictor_repo]
}
Postman request issued agains http://b3bc97d4.execute-api.localhost.localstack.cloud:4566/predict returns the expected response.
Summary
This was a lot of fun! What surprised me the most was how smoothly everything ran with LocalStack. Why? Well, LocalStack runs on Docker, and I also defined a container repository in my Terraform definitions. I was concerned that LocalStack wouldn’t handle this “Docker inside Docker” recursion, but it did - beautifully, as always. I think LocalStack will become a go-to tool in my workflow whenever I’m working with AWS.